
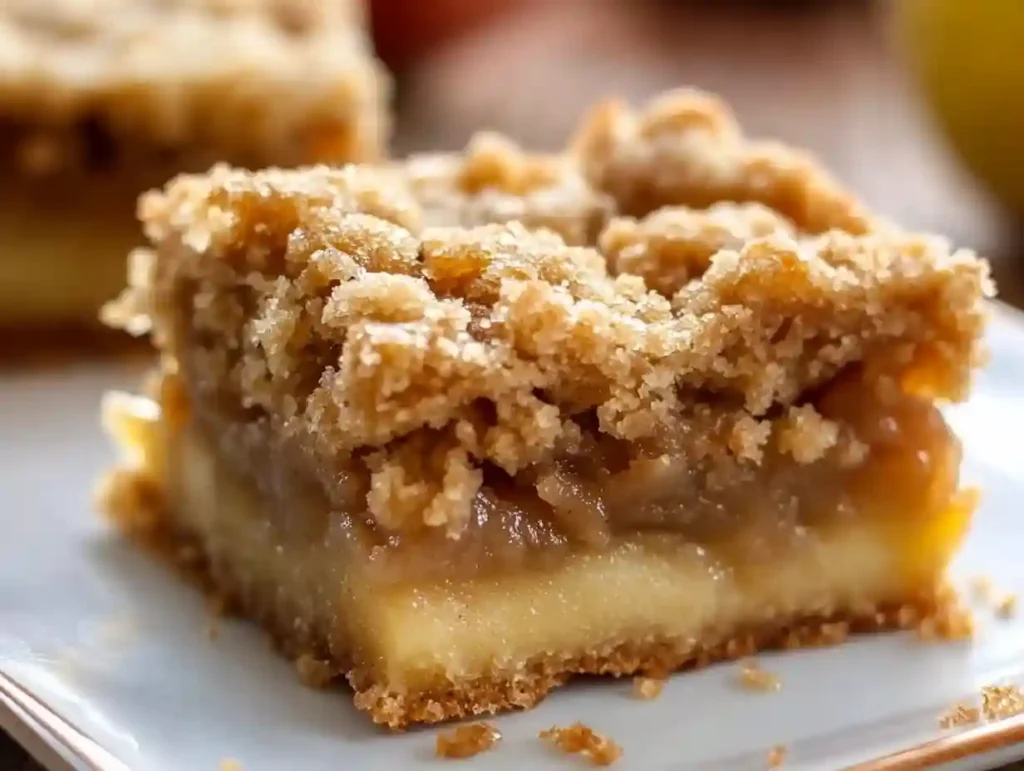
Few desserts evoke cozy memories and warm kitchens quite like Apple Crumb Bars. Imagine tender, cinnamon-spiced apples sandwiched between layers of buttery, crumbly pastry—a treat that’s simple enough for a weekday snack, but delicious enough to impress at any gathering. Apple Crumb Bars are everything you love about homemade apple pie, made easy and portable. These bars have a perfectly balanced combination of sweetness, spice, and a satisfying crunch in every bite.
Why Apple Crumb Bars Are a Must-Try
Apple Crumb Bars are one of those recipes that bring everyone to the kitchen. They fill your home with the comforting aroma of cinnamon and baked apples—a scent that signals something wonderful is coming out of the oven. With their crisp, golden crust and the gooey apple center, these bars strike a balance between rustic and refined. They’re easy to transport, cut, and share, making them ideal for school lunches, bake sales, potlucks, or family dinners.
The Story Behind the Bars
While classic apple pie holds a special place in many hearts, it can be a project to make from scratch—rolling dough, carefully layering apples, and perfecting the crust. Apple Crumb Bars deliver the same flavors and nostalgia but with far less fuss. The recipe is incredibly forgiving, and because it’s made in a pan, it yields enough to feed a crowd or to enjoy leftovers all week long.
Apple crumb bars also allow for creativity. Swap in pears, add nuts or oats to the topping, or drizzle with caramel for your own twist. But even in their classic form, these bars shine.
The Key Ingredients
For the Crust and Topping:
- 2 1/2 cups all-purpose flour
- 1 cup granulated sugar
- 1/2 teaspoon baking powder
- 1/2 teaspoon cinnamon
- 1 cup unsalted butter, cold and cubed
- 1 large egg
For the Apple Filling:
- 5 cups peeled, diced apples (choose tart-sweet apples like Granny Smith, Honeycrisp, or Fuji for best flavor)
- 1/2 cup granulated sugar
- 2 tablespoons all-purpose flour
- 1/2 teaspoon cinnamon
- 1/4 teaspoon nutmeg
Step-by-Step Instructions
1. Preheat the Oven
Begin by preheating your oven to 350°F (175°C). Lightly grease a 9×13-inch baking pan with butter or non-stick spray. Lining the pan with parchment paper also makes lifting and slicing the bars easier after baking.
2. Make the Crust and Topping
In a spacious mixing bowl, combine the flour, sugar, baking powder, and cinnamon, whisking until evenly blended. Add the cold, cubed butter. Using a pastry blender, a fork, or your hands, work the butter into the flour mixture until it forms a crumbly texture with small, pea-sized pieces. Don’t worry if some chunks are slightly larger—keeping the butter cold is essential for achieving a light, tender crust.
Crack the egg into the bowl and mix gently until just combined. The mixture should still be crumbly, not doughy. Measure out about half of this mixture and press it firmly into the bottom of your prepared pan to form an even layer. This will become the sturdy base of your bars.
3. Prepare the Apple Filling
Peel and core the apples, then cut them into small cubes. Place the diced apples in a separate bowl and sprinkle them with sugar, flour, cinnamon, and nutmeg. Gently toss everything together until the apples are well coated. The flour will help the filling set as it bakes, while the spices add that classic, comforting apple pie taste to every bite.
Spread the apple mixture evenly over the pressed crust in your pan.
4. Add the Crumb Topping
Take the remaining half of the crumb mixture and scatter it evenly over the apples. It’s okay if some apples peek through—the topping will crisp up beautifully in the oven, creating a delicious, golden layer.
5. Bake
Transfer the pan to your preheated oven and bake for 40–45 minutes, or until the top is golden brown and you can see the apples bubbling through the crumb. The aroma of baked apples and cinnamon will fill your kitchen.
6. Cool and Slice
Let the bars cool completely in the pan to set the filling and make slicing easier. Once cool, lift them out (if using parchment) and cut into squares or bars. They’re sturdy enough to pick up with your hands, but tender enough to melt in your mouth.
Tips for the Best Apple Crumb Bars
- Use Cold Butter: This creates the best crumbly texture for both crust and topping.
- Apple Variety Matters: Mixing tart and sweet apples adds depth. Avoid apples that get mushy when baked.
- Don’t Overbake: Remove the bars when the topping is golden—the filling will continue to set as they cool.
- Get Creative: Add a handful of chopped walnuts, pecans, or rolled oats to the crumb for extra crunch.
- Serving Suggestion: Warm bars are heavenly with a scoop of vanilla ice cream or a drizzle of caramel sauce.
Storage and Make-Ahead Tips
Apple Crumb Bars keep well! Store them covered at room temperature for up to two days, or refrigerate for up to five days. They also freeze beautifully—wrap individual bars and thaw at room temperature for a quick treat anytime.
For gatherings, you can bake the bars the day before and store them, covered, in the fridge. This not only saves time but also helps the flavors meld.
Frequently Asked Questions
Can I use other fruits?
Absolutely! Try pears, peaches, or a berry blend for a new twist.
Can I make these gluten-free?
Yes—simply substitute your favorite gluten-free flour blend for the all-purpose flour.
What apples are best?
Tart-sweet apples like Granny Smith, Braeburn, or Honeycrisp hold up well and provide balanced flavor.
Final Thoughts
Apple Crumb Bars are everything you want in a homemade dessert: easy to make, easy to share, and absolutely delicious. Their sweet-tart apple filling and buttery crumb topping make them a favorite for fall baking—but they’re too good to limit to just one season. Whether you serve them at a holiday feast or tuck them into a lunchbox, these bars will always deliver that nostalgic, homemade flavor everyone loves.
Assembling Your Apple Crumb Bars
With your crust, topping, and filling ready, it’s time to bring everything together for baking.
1. Layer the Bars:
Take half of the crumbly dough mixture and press it firmly into the bottom of your greased (or parchment-lined) 9×13-inch pan. Make sure to spread it evenly, reaching all corners, as this will form the sturdy base for your bars.
2. Add the Apple Filling:
Evenly spoon the prepared apple mixture over the crust. Spread it gently so you get a consistent layer of apples in every slice. Don’t worry if the apples are piled a little high—they’ll soften and settle as they bake.
3. Top with Crumbs:
Sprinkle the remaining crumb mixture over the apples, breaking up any large pieces and distributing them evenly. Some apples peeking through is just fine—the crumb topping will brown and crisp up in the oven.
4. Bake to Golden Perfection:
Slide the pan into your preheated oven and bake for 40–45 minutes, or until the top is golden brown and you can see the filling bubbling up at the edges. The aroma will fill your kitchen with a scent that’s pure comfort!
5. Cool and Slice:
Once baked, remove the pan from the oven and allow the bars to cool completely. This step is important—it helps the filling firm up and makes slicing much easier. For best results, let the bars cool in the pan on a wire rack for at least an hour.
6. Serve and Enjoy:
When fully cooled, lift the bars from the pan (if using parchment paper) and cut them into squares or rectangles. Enjoy them as they are, or serve warm with a scoop of vanilla ice cream for a truly indulgent treat.
Tips for Perfect Apple Crumb Bars
- Even Slicing: Use a sharp knife and wipe it between cuts for clean edges.
- Custom Touches: Add a handful of chopped nuts or rolled oats to the topping for extra crunch.
- For Extra Caramel Flavor: Drizzle the cooled bars with caramel sauce or dust with powdered sugar.
- Travel Friendly: These bars are sturdy, making them great for lunchboxes, picnics, or bake sales.
Storing and Freezing
Apple Crumb Bars can be stored in an airtight container at room temperature for up to two days, or in the refrigerator for about a week. If you want to freeze them, wrap the cooled bars individually and store in a freezer-safe bag or container for up to three months. To serve, thaw at room temperature or warm in the microwave for a few seconds.
Frequently Asked Questions
Can I use other fruits?
Yes! These bars are just as delicious with pears, peaches, or berries—adjust sugar and spices to taste.
Can I make this gluten-free?
Absolutely—substitute a gluten-free all-purpose flour blend for the regular flour.
Do I need to peel the apples?
Peeling is recommended for the best texture, but if you prefer a more rustic bar and extra fiber, you can leave the skins on.
The Heart of Homemade Baking
Apple Crumb Bars embody everything we love about classic, homemade desserts: simple ingredients, easy preparation, and the unbeatable taste of real fruit and buttery crumbs. They’re perfect for fall, but delicious any time you’re craving something comforting and sweet. Share them with friends, bring them to gatherings, or enjoy them with a warm drink on a quiet afternoon.
After one bite, you’ll see why this recipe becomes a family favorite. It’s the kind of treat that disappears quickly and is always met with requests for “just one more square.”
Print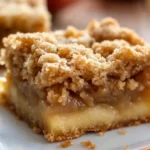
Apple Crumb Bars: The Ultimate Comfort Dessert
Ingredients
For the Crust and Topping:
- 2 1/2 cups all-purpose flour
- 1 cup granulated sugar
- 1/2 teaspoon baking powder
- 1/2 teaspoon cinnamon
- 1 cup unsalted butter, cold and cubed
- 1 large egg
For the Apple Filling:
- 5 cups peeled, diced apples (choose tart-sweet apples like Granny Smith, Honeycrisp, or Fuji for best flavor)
- 1/2 cup granulated sugar
- 2 tablespoons all-purpose flour
- 1/2 teaspoon cinnamon
- 1/4 teaspoon nutmeg
Instructions
Begin by preheating your oven to 350°F (175°C). Lightly grease a 9×13-inch baking pan with butter or non-stick spray. Lining the pan with parchment paper also makes lifting and slicing the bars easier after baking.
In a spacious mixing bowl, combine the flour, sugar, baking powder, and cinnamon, whisking until evenly blended. Add the cold, cubed butter. Using a pastry blender, a fork, or your hands, work the butter into the flour mixture until it forms a crumbly texture with small, pea-sized pieces. Don’t worry if some chunks are slightly larger—keeping the butter cold is essential for achieving a light, tender crust.
Crack the egg into the bowl and mix gently until just combined. The mixture should still be crumbly, not doughy. Measure out about half of this mixture and press it firmly into the bottom of your prepared pan to form an even layer. This will become the sturdy base of your bars.
Peel and core the apples, then cut them into small cubes. Place the diced apples in a separate bowl and sprinkle them with sugar, flour, cinnamon, and nutmeg. Gently toss everything together until the apples are well coated. The flour will help the filling set as it bakes, while the spices add that classic, comforting apple pie taste to every bite.
Spread the apple mixture evenly over the pressed crust in your pan.
Take the remaining half of the crumb mixture and scatter it evenly over the apples. It’s okay if some apples peek through—the topping will crisp up beautifully in the oven, creating a delicious, golden layer.
Transfer the pan to your preheated oven and bake for 40–45 minutes, or until the top is golden brown and you can see the apples bubbling through the crumb. The aroma of baked apples and cinnamon will fill your kitchen.
Let the bars cool completely in the pan to set the filling and make slicing easier. Once cool, lift them out (if using parchment) and cut into squares or bars. They’re sturdy enough to pick up with your hands, but tender enough to melt in your mouth.
So gather your apples, preheat the oven, and fill your home with the delightful scent of baking. Apple Crumb Bars are waiting—ready to become a beloved staple in your baking repertoire!
Try them once, and they’re sure to become a staple in your recipe collection—bringing smiles and sweet comfort, one crumbly bite at a time!