
About This Recipe
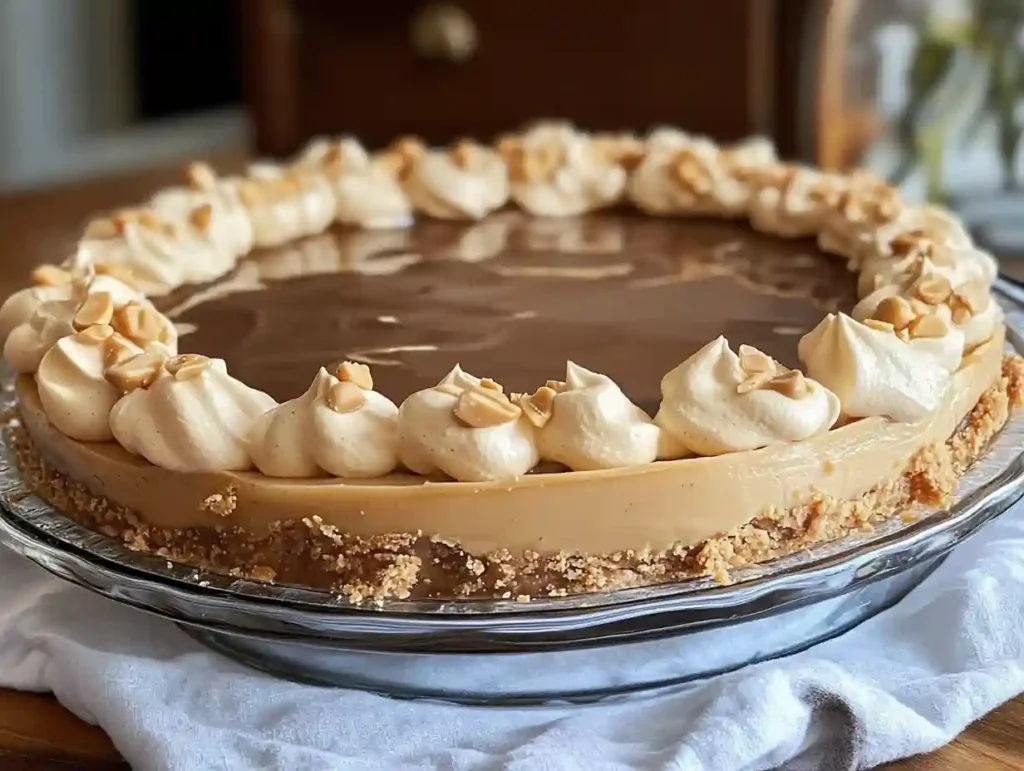
Amish Chocolate Peanut Butter Pie is a decadent, no‑bake dessert that combines a crunchy graham cracker crust with layers of creamy peanut butter filling and silky chocolate ganache. Rooted in Amish baking traditions—where simplicity, quality ingredients, and minimal fuss reign supreme—this pie delivers maximum flavor with minimal effort. Perfect for potlucks, holidays, or any time you crave an indulgent homemade peanut butter pie, it’s sure to become a family favorite dessert that disappears fast.
Why You’ll Love This Amish Chocolate Peanut Butter Pie
- No‑Bake Convenience: Skip the oven and let your refrigerator do the work.
- Creamy, Dreamy Texture: The peanut butter layer is rich and velvety—no grainy texture.
- Decadent Chocolate Topping: A glossy ganache layer elevates this pie to rich chocolate pie status.
- Make‑Ahead Friendly: Assemble up to 48 hours in advance for stress‑free entertaining.
- Versatile & Customizable: Swap graham crackers for chocolate cookies, adjust sweetness, or add chopped peanuts for crunch.
Ingredients
For the Graham Cracker Crust (or Cookie Crust)
- 1¾ cups (about 180 g) finely crushed graham crackers or chocolate sandwich cookies
- ¼ cup (50 g) granulated sugar
- 6 tablespoons (85 g) unsalted butter, melted
For the Peanut Butter Filling
- 1 cup (240 g) creamy peanut butter (natural or standard)
- 8 oz (225 g) cream cheese, softened
- 1 cup (120 g) powdered sugar, sifted
- 1 teaspoon pure vanilla extract
- 1 cup (240 ml) heavy whipping cream, cold
For the Chocolate Ganache Topping
- 8 oz (225 g) semi‑sweet or bittersweet chocolate, finely chopped
- ½ cup (120 ml) heavy cream
- 2 tablespoons (30 g) unsalted butter, softened
Step‑by‑Step Instructions
1. Prepare the Easy No‑Bake Crust
- Crush the Cookies: Place graham crackers or chocolate sandwich cookies in a food processor. Pulse until fine crumbs form.
- Mix with Sugar & Butter: In a medium bowl, stir together crumbs, sugar, and melted butter until evenly moistened.
- Press into Pan: Transfer the mixture to a 9‑inch (23 cm) pie plate. Use the bottom of a measuring cup or a flat glass to press crumbs firmly and evenly along the bottom and up the sides, creating a uniform crust.
- Chill: Refrigerate for at least 30 minutes to set the crust. This make ahead pie crust can be prepared up to a day before assembling the filling.
2. Whip Up the Peanut Butter Layer
- Beat Cream Cheese & Peanut Butter: In a large bowl, use an electric mixer to blend cream cheese and peanut butter until smooth and creamy—about 2 minutes on medium speed.
- Sweeten & Flavor: Add powdered sugar and vanilla extract. Beat on low speed until just combined, then increase to medium and beat until silky.
- Stabilize with Cream: In a separate chilled bowl, whip heavy cream with clean beaters until stiff peaks form. Gently fold whipped cream into the peanut butter mixture in three additions, preserving as much air as possible.
- Fill the Crust: Spoon the peanut butter filling into the chilled crust. Smooth the top with an offset spatula to create a level layer. Return pie to the refrigerator while you prepare the ganache.
3. Create the Silky Chocolate Ganache
- Heat the Cream: In a small saucepan, heat heavy cream over medium‑low until it just begins to simmer (do not boil).
- Melt the Chocolate: Place chopped chocolate in a heat‑proof bowl. Pour hot cream over the chocolate and let stand for 1 minute.
- Stir to Emulsify: Add softened butter, then stir gently from the center outward until the mixture becomes glossy ganache.
- Top the Pie: Pour the ganache over the chilled peanut butter layer, tilting the pie plate so ganache spreads to the edges. Use a small spatula to spread evenly.
4. Chill & Serve
- Set the Layers: Refrigerate the assembled pie for at least 4 hours, preferably overnight. This chilling time ensures clean slices and a fully set no‑bake treat.
- Slice with Ease: For clean cuts, run a sharp knife under hot water, wipe dry, then slice the pie. Repeat between slices.
- Garnish (Optional): Sprinkle chopped peanuts, mini peanut butter cups, or a drizzle of melted chocolate over each slice before serving.
Tips for Success
- Room‑Temperature Ingredients: Ensure cream cheese and butter are softened to avoid lumps in your filling.
- Cold Whipping Cream: Chill both cream and bowl for faster, more stable whipped cream.
- Even Layers: Use an offset spatula for flat, professional‑looking peanut butter and ganache layers.
- Flavor Variations: Swap creamy peanut butter for dark chocolate peanut butter, or swirl in Nutella for a decadent chocolate peanut butter pie twist.
- Cookie Crust Option: Use crushed chocolate sandwich cookies (Oreo® style) in place of graham crackers for a chocolate crust variation.
Frequently Asked Questions
Q: Can I make this pie gluten‑free?
A: Yes. Use certified gluten‑free graham crackers or gluten‑free chocolate sandwich cookies for the crust. Ensure your peanut butter and chocolate are also labeled gluten‑free.
Q: How long will the pie keep?
A: Stored in an airtight container, this homemade pie stays fresh in the refrigerator for up to 5 days. For longer storage, freeze uncut slices in a sealed freezer bag for up to 3 months.
Q: Can I use crunchy peanut butter instead?
A: Absolutely. For extra texture, swap creamy peanut butter with chunky peanut butter. The nut pieces will add a delightful crunch.
Q: Is there a vegan version?
A: Yes—use dairy‑free cream cheese, coconut cream whipped topping, vegan butter, and dairy‑free chocolate to create a plant‑based version of this no‑bake pie.
Variations & Customizations
- Salted Caramel Drizzle: After chilling, drizzle warm caramel sauce and sprinkle flaky sea salt for an elevated caramel peanut butter pie experience.
- Mint Chocolate Twist: Add ½ teaspoon peppermint extract to your ganache and pipe whipped cream rosettes on top.
- Nutella Swirl: Gently swirl ¼ cup Nutella into the peanut butter filling before chilling to create a marbled effect.
- S’mores Style: Top the ganache with mini marshmallows, then briefly broil until toasted.
Serving Suggestions
- Pair slices with a scoop of vanilla ice cream or a dollop of fresh whipped cream for an extra indulgence.
- Offer alongside strong coffee or espresso to balance the pie’s sweetness.
- Present this crowd‑pleasing dessert at summer barbecues, autumn potlucks, or holiday gatherings—guests will rave about your effortless yet impressive treat.
Amish Chocolate Peanut Butter Pie proves that the best easy dessert recipes blend simple, high‑quality ingredients with straightforward techniques. Whether you’re an experienced baker or a novice cook, this make ahead pie delivers a luscious, unforgettable finish to any meal. So gather your ingredients, follow these steps, and prepare to impress with a slice of creamy peanut butter and glossy chocolate perfection!