
Introduction
Few treats evoke childhood nostalgia and simple comfort like the classic peanut butter cookie. With its signature crisscross fork marks, tender yet slightly crisp texture, and unmistakable nutty flavor, this humble cookie has earned a permanent place on cookie trays, lunchboxes, and afternoon teatime spreads around the world. Despite its simplicity—requiring just a handful of pantry staples—perfecting the peanut butter cookie can feel surprisingly nuanced. In this guide, you’ll discover everything from the recipe and step-by-step instructions to the science behind the texture, creative variations, and expert tips to help you bake foolproof cookie batches every time.
A Brief History of the Peanut Butter Cookie
Peanut butter itself was patented in the late 19th century, but it wasn’t until the early 1930s that the peanut butter cookie made its debut. Legend credits George Washington Carver with popularizing peanuts and peanut butter as a nutritious food for Americans during the Great Depression. Soon after, home bakers began experimenting with the spread in cookies, replacing more expensive ingredients like butter or sugar with economical peanut butter. The distinctive fork-pressed pattern emerged as a practical solution: the dense peanut dough needed flattening to bake evenly, and the crisscross design became an iconic trademark.
Why You’ll Love This Recipe
- Minimal Ingredients: No complicated flavorings—just peanut butter, sugar, an egg, and a few leaveners for lift.
- One-Bowl Prep: Skip the extra dishes. This cookie dough comes together in one mixing bowl, saving time and reducing cleanup.
- Classic Texture: Crisp around the edges, tender in the center, and deeply peanut-buttery.
- Make-Ahead & Freezable: Dough can be chilled or frozen for a convenient bake-whenever treat.
- Endless Variations: From drizzled chocolate to chopped nuts, the base recipe adapts beautifully.
Ingredients (Makes ~24 Cookies)
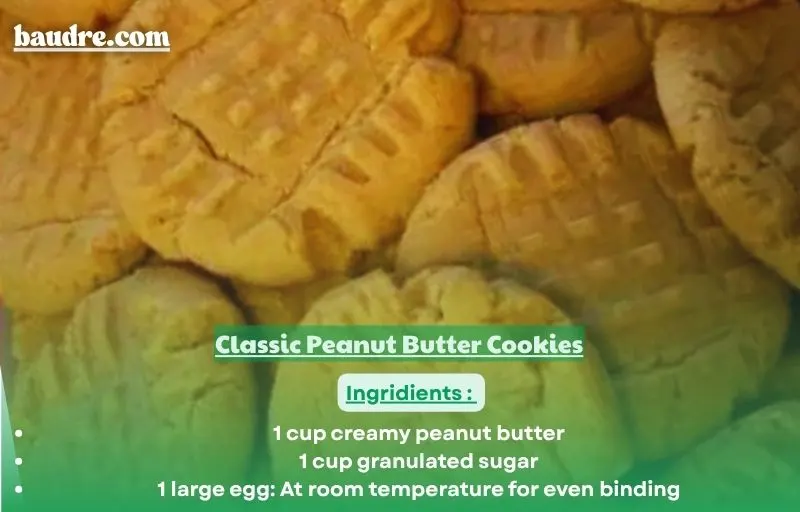
- 1 cup creamy peanut butter: Natural or classic, unsalted or lightly salted
- 1 cup granulated sugar: White sugar yields a crisp surface and sweet balance
- 1 large egg: At room temperature for even binding
- 1 teaspoon pure vanilla extract: Enhances overall flavor (optional but recommended)
- ½ teaspoon baking soda: Provides gentle lift and keeps cookies from spreading too flat
- ¼ teaspoon fine salt: Skip if your peanut butter is already salted
- Optional Mix-Ins:
- ½ cup semi-sweet chocolate chips or chunks
- ¼ cup chopped roasted peanuts for extra crunch
- A sprinkle of flaky sea salt on top, post-bake
Equipment You’ll Need
- Large mixing bowl
- Measuring cups and spoons
- Wooden spoon or sturdy spatula
- Baking sheets (two for batch baking)
- Parchment paper or silicone baking mats
- Fork for pressing patterns
- Cooling rack
Step-by-Step Instructions
- Preheat & Prepare
Preheat your oven to 350°F (175°C). Line two baking sheets with parchment paper or silicone mats to prevent sticking and ensure even browning. - Mix the Dough
In the large bowl, combine the peanut butter and granulated sugar. Stir vigorously until the mixture becomes smooth and slightly glossy. Add the egg, vanilla extract (if using), baking soda and salt. Mix just until everything comes together into a cohesive dough—avoid overmixing to keep cookies tender. - Portion the Dough
Using a tablespoon or a small cookie scoop, portion out roughly 1½-tablespoon mounds of dough and roll each into a ball between your palms. Arrange the dough balls on the prepared baking sheets, leaving about 2 inches of space between them to allow for spreading. - Create the Crisscross Pattern
Dip the tines of a fork in granulated sugar (this prevents sticking) and lightly press down on each dough ball, first in one direction, then rotating 90° and pressing again. The cookies should measure about ¾-inch thick after pressing. - Bake
Place a baking sheet in the center of the preheated oven. Bake for 10–12 minutes, or until the edges are lightly golden and the centers appear set but still soft. For batches, rotate the sheets halfway through — top to bottom and front to back — for even coloration. - Cool & Set
Remove the baking sheet from the oven and allow the cookies to rest undisturbed for 5 minutes. This “carryover baking” lets the centers finish cooking without overbrowning. Then, transfer the cookies to a wire rack to cool completely.
The Science of Texture
- Leavener: Baking soda reacts with peanut butter’s acidity to generate carbon dioxide, creating lift and preventing a rock-hard cookie.
- Sugar-to-Butter Ratio: Since peanut butter replaces both fat and part of the sugar, the 1:1 ratio here produces a cookie that’s crisp on the edges yet chewy inside.
- Room-Temperature Egg: Ensures the dough emulsifies evenly, promoting consistent texture.
- Rest Before Serving: Allowing cookies to cool on the baking sheet solidifies their centers without sacrificing softness.
Expert Tips for Perfect Cookies
- Chill for Thicker Cookies: If you prefer a taller, chewier cookie, refrigerate formed dough balls for 30 minutes before pressing and baking.
- Avoid Overbaking: Even if the centers look slightly underdone at 10 minutes, they’ll finish cooking off the heat. Overbaked peanut butter cookies become dry.
- Customize Sweetness: Swap half the white sugar with light brown sugar for a hint of molasses flavor and extra moisture.
- Test Batch: Oven temperatures vary. Bake a single test cookie first to gauge ideal timing for your setup.
- Prevent Spreading: If your cookies spread too thin, reduce oven temperature by 10°F or add a tablespoon of flour to the dough.
Creative Variations
- Chocolate-Drizzle Delight: Once cooled, melt ¼ cup semisweet chocolate chips with 1 teaspoon coconut oil; drizzle over cookies and let set.
- Stuffed Surprise: Flatten dough balls, place a miniature peanut butter cup in the center, then reform into a ball before pressing.
- Nutty Crunch: Fold in ¼ cup toasted, chopped peanuts for textural contrast.
- Spicy Kick: Stir in ⅛ teaspoon cayenne or chipotle powder for a sweet-spicy twist.
- Vegan Adaptation: Replace the egg with a flax egg (1 tablespoon ground flaxseed + 3 tablespoons water, chilled 5 minutes) and use vegan-friendly peanut butter.
Frequently Asked Questions
Can I make the dough ahead of time?
Absolutely. Shape the dough into balls and freeze them on a baking sheet until firm. Transfer the frozen cookies to a sealed bag, then bake straight from the freezer—just add 1–2 minutes to the normal bake time.
How should I store these cookies?
Once completely cool, layer cookies in an airtight container with parchment or wax paper between layers. They’ll stay fresh at room temperature for up to 5 days.
Can I freeze baked cookies?
Absolutely. Place cooled cookies in a single layer in a freezer-safe bag, using parchment between layers. Freeze for up to 3 months; thaw at room temperature.
Why didn’t my crisscross pattern hold?
If your dough is too soft or warm, the cookies may spread excessively. Chill the dough balls for 15–30 minutes before pressing for crisp, defined patterns.
Serving Suggestions
- Milk & Cookies: The timeless pairing—serve with cold milk (dairy or plant-based).
- Ice Cream Sandwiches: Sandwich a scoop of vanilla ice cream between two cookies for a nostalgic treat.
- Cookie Crumble Topping: Crumble cooled cookies over yogurt, oatmeal or ice cream sundaes.
- Festive Display: Arrange on a tiered tray with other bite-sized sweets for holiday gatherings.

Classic Peanut Butter Cookies: A Complete Guide
Ingredients
- 1 cup creamy peanut butter: Natural or classic, unsalted or lightly salted
- 1 cup granulated sugar: White sugar yields a crisp surface and sweet balance
- 1 large egg: At room temperature for even binding
- 1 teaspoon pure vanilla extract: Enhances overall flavor (optional but recommended)
- ½ teaspoon baking soda: Provides gentle lift and keeps cookies from spreading too flat
- ¼ teaspoon fine salt: Skip if your peanut butter is already salted
- Optional Mix-Ins:
- ½ cup semi-sweet chocolate chips or chunks
- ¼ cup chopped roasted peanuts for extra crunch
- A sprinkle of flaky sea salt on top, post-bake
Instructions
- Preheat & Prepare
Preheat your oven to 350°F (175°C). Line two baking sheets with parchment paper or silicone mats to prevent sticking and ensure even browning. - Mix the Dough
In the large bowl, combine the peanut butter and granulated sugar. Stir vigorously until the mixture becomes smooth and slightly glossy. Add the egg, vanilla extract (if using), baking soda and salt. Mix just until everything comes together into a cohesive dough—avoid overmixing to keep cookies tender. - Portion the Dough
Using a tablespoon or a small cookie scoop, portion out roughly 1½-tablespoon mounds of dough and roll each into a ball between your palms. Arrange the dough balls on the prepared baking sheets, leaving about 2 inches of space between them to allow for spreading. - Create the Crisscross Pattern
Dip the tines of a fork in granulated sugar (this prevents sticking) and lightly press down on each dough ball, first in one direction, then rotating 90° and pressing again. The cookies should measure about ¾-inch thick after pressing. - Bake
Place a baking sheet in the center of the preheated oven. Bake for 10–12 minutes, or until the edges are lightly golden and the centers appear set but still soft. For batches, rotate the sheets halfway through — top to bottom and front to back — for even coloration. - Cool & Set
Remove the baking sheet from the oven and allow the cookies to rest undisturbed for 5 minutes. This “carryover baking” lets the centers finish cooking without overbrowning. Then, transfer the cookies to a wire rack to cool completely.
Final Thoughts
The classic peanut butter cookie is proof that the simplest recipes can yield the most satisfying results. With minimal ingredients, one-bowl prep and endless opportunities for customization, these cookies invite both baking beginners and seasoned home chefs to experiment and share. Whether you’re chasing a sweet craving, baking with kids or looking to impress guests with handmade comfort treats, mastering this peanut butter cookie will become a cherished skill in your cookie repertoire. Enjoy the aroma, savor the first bite—and delight in how a few humble ingredients transform into a delicious, heartwarming indulgence.