
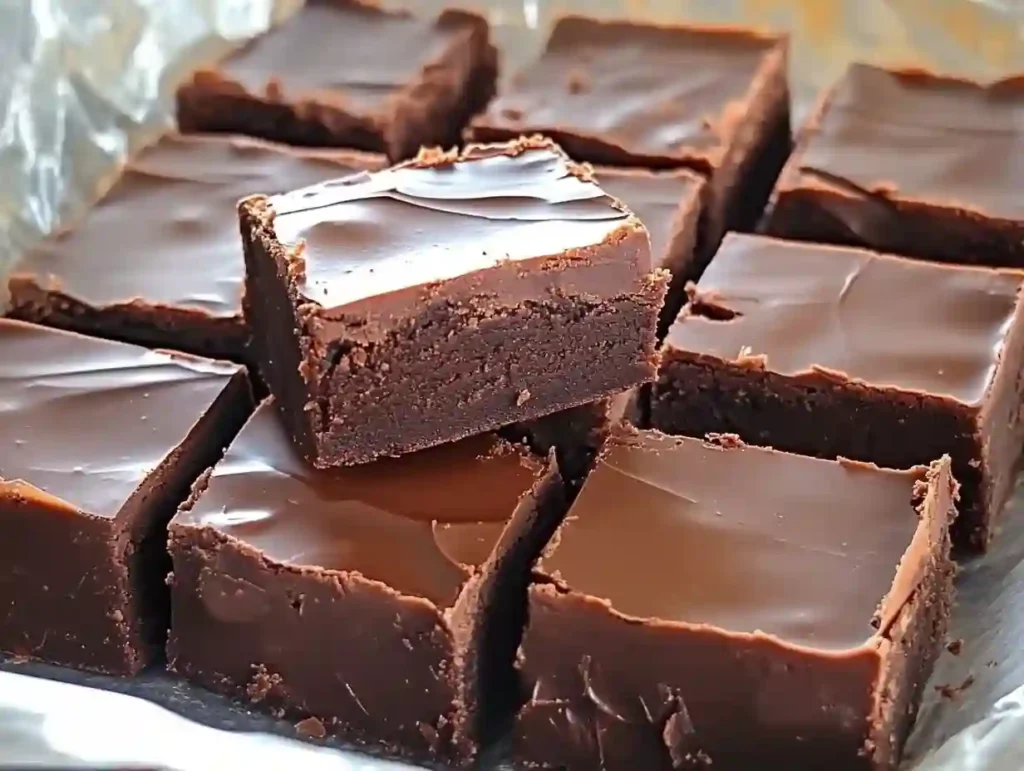
Few treats capture the charm of classic homemade sweets like old fashioned fudge. Rich, smooth, and deeply chocolatey, this dessert has been delighting families for generations. While modern fudge recipes often use shortcuts, the traditional method produces a texture and flavor that’s hard to beat. It’s creamy yet firm enough to slice, melts on the tongue, and carries a deep cocoa essence balanced by just the right amount of sweetness. This recipe takes you step-by-step through making a decadent old fashioned fudge that tastes just like it came from a vintage candy shop.
Why Old Fashioned Fudge Is So Special
Unlike quick fudge recipes that rely on sweetened condensed milk or marshmallow creme, old fashioned fudge is made by boiling sugar, butter, milk, and cocoa until they reach the perfect temperature. The result is a candy with a fine-grained texture and a melt-in-your-mouth quality. Making it the traditional way takes a little patience and precision, but the reward is a treat that feels timeless and handcrafted. It’s a recipe you can pass down, just like your grandmother or great-aunt might have done.
Ingredients
- 3 cups granulated sugar
- 3/4 cup unsweetened cocoa powder
- 1/8 teaspoon salt
- 1 1/2 cups whole milk
- 1/4 cup unsalted butter
- 1 teaspoon pure vanilla extract
Step-by-Step Instructions
Step 1: Prepare Your Pan
Line an 8-inch square baking dish with parchment paper or lightly butter it. This will make it easier to remove the fudge later. Have all your ingredients measured and ready before you begin, as fudge requires careful timing.
Step 2: Combine the Dry Ingredients
In a heavy-bottomed saucepan, whisk together the sugar, cocoa powder, and salt until well blended. This helps prevent lumps and ensures the cocoa is evenly distributed.
Step 3: Add Milk and Begin Cooking
Stir in the milk until the mixture is smooth. Place the saucepan over medium heat and cook, stirring constantly, until the sugar has dissolved and the mixture begins to boil.
Step 4: Boil Without Stirring
Once the mixture reaches a full boil, stop stirring. Attach a candy thermometer to the side of the pan and let the mixture cook undisturbed until it reaches the soft-ball stage, about 234°F (112°C). This is crucial for achieving the proper fudge texture.
Step 5: Add Butter and Cool
Remove the saucepan from the heat and add the butter and vanilla. Do not stir yet. Let the mixture cool undisturbed to about 110°F (43°C). This cooling period is essential for allowing the sugar crystals to form properly.
Step 6: Beat the Fudge
Once cooled, beat the mixture with a wooden spoon until it thickens and loses some of its gloss. This can take 5–10 minutes. The mixture will become more opaque and slightly stiff.
Step 7: Pour and Set
Quickly pour the fudge into the prepared pan and spread it evenly. Allow it to cool at room temperature until fully set, about 2–3 hours. Once firm, cut into squares with a sharp knife.
Tips for Perfect Old Fashioned Fudge
- Use a heavy-bottomed saucepan to prevent scorching.
- Avoid stirring after the mixture begins boiling—this can cause unwanted crystallization and a grainy texture.
- A candy thermometer ensures accuracy, but you can also test the soft-ball stage by dropping a bit of the mixture into cold water; it should form a soft, pliable ball.
- Beating the fudge at the right temperature is key. If it’s too hot, it may seize; if it’s too cool, it may set before you can spread it.
Flavor Variations
Once you master the base recipe, you can experiment with different flavors and mix-ins:
- Add 1 cup chopped nuts, such as walnuts or pecans, during the beating stage.
- Stir in mini marshmallows for a rocky road variation.
- Add a teaspoon of espresso powder with the cocoa for a mocha twist.
- Swap vanilla for peppermint extract and sprinkle with crushed candy canes for a festive holiday treat.
Serving Suggestions
Fudge is a versatile sweet that works well in many settings. Serve it at holiday gatherings, package it in gift boxes for friends and neighbors, or keep a small batch in the fridge for after-dinner indulgence. It’s also a great addition to dessert trays alongside cookies and candies.
Storing Your Fudge
Store old fashioned fudge in an airtight container at room temperature for up to 2 weeks. For longer storage, you can refrigerate it, but be aware that refrigeration can cause it to dry out slightly. You can also freeze fudge for up to 3 months; just wrap it tightly in wax paper and place it in a freezer-safe container.
Common Mistakes to Avoid
- Overcooking: This leads to dry, crumbly fudge. Keep a close eye on the temperature.
- Undercooking: If the mixture doesn’t reach the soft-ball stage, the fudge may not set properly.
- Skipping the Cooling Period: Beating the mixture while it’s too hot can ruin the texture.
- Rushing the Beating: This step develops the smooth, creamy texture—don’t cut it short.
Why This Recipe Is Worth the Effort
In a world of quick and easy desserts, there’s something deeply satisfying about taking the time to make fudge the traditional way. The process itself becomes part of the pleasure, as you watch the transformation from liquid to luscious squares of chocolatey goodness. The reward is a candy that has the perfect balance of sweetness, richness, and texture—a true classic that never loses its appeal.
When to Make Old Fashioned Fudge
While fudge is popular during the winter holidays, it’s a treat you can enjoy year-round. Make it in summer for a no-oven dessert, in autumn to pair with spiced drinks, or in spring to brighten an afternoon tea. It’s always a hit at bake sales and potlucks, and it makes a thoughtful homemade gift for birthdays or special occasions.
Final Thoughts
Decadent Old Fashioned Fudge is a dessert that connects the past with the present. Its timeless flavor, rich chocolate profile, and satisfying texture remind us why some recipes never go out of style. Whether you’re making it for the first time or carrying on a family tradition, this fudge will fill your kitchen with sweetness and your heart with nostalgia. Once you’ve mastered it, you’ll have a go-to recipe that brings joy to every occasion.