
There’s something magical about a warm, crusty loaf of Rustic No Knead Rosemary Garlic Bread—especially when it’s made with love in your own kitchen. This simple yet deeply flavorful bread recipe is perfect for anyone craving a wholesome homemade experience. Packed with the bold flavors of roasted garlic and aromatic rosemary, it’s a traditional favorite with a modern, easy twist. Plus, it’s healthy, doesn’t require kneading, and fits right into a busy American lifestyle.
The History of No Knead Bread
The Roots of No Knead Techniques
The no-knead bread method soared in popularity thanks to Jim Lahey’s method introduced through The New York Times. However, it dates back much earlier, rooted in rustic European-style loaves that relied on slow fermentation instead of hard kneading. It’s bread that almost makes itself.
Rosemary and Garlic in Traditional Baking
Both rosemary and garlic have deep roots in Mediterranean cooking. They’re ancient staples used not just for flavor, but also for their health-promoting properties. When paired together in bread, they elevate even the simplest loaf into something extraordinary.
Print
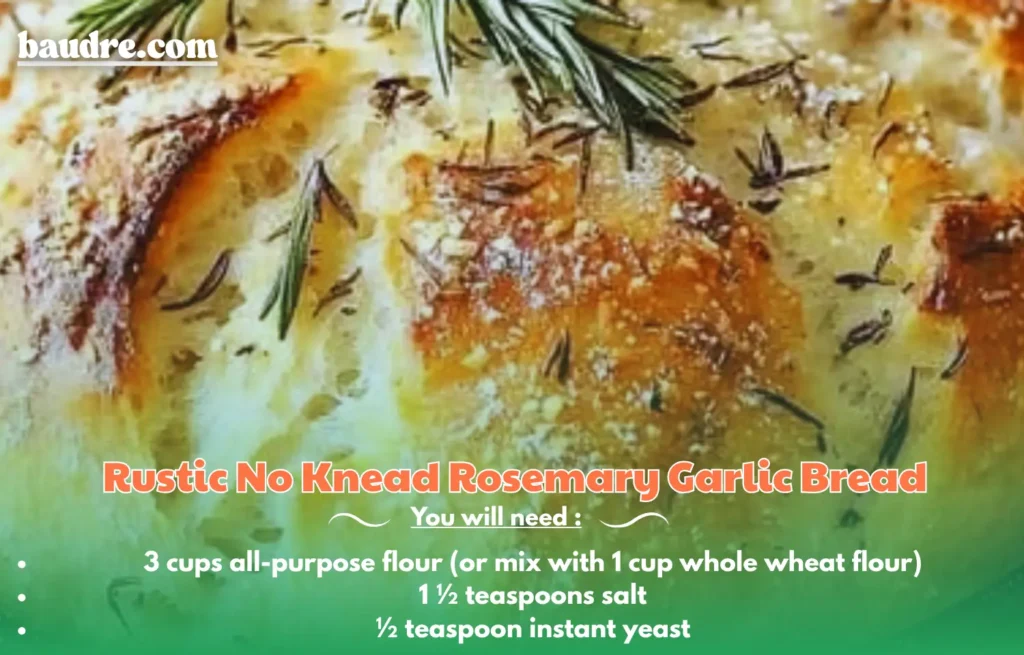
Rustic No Knead Rosemary Garlic Bread
Ingredients
- 3 cups all-purpose flour (or mix with 1 cup whole wheat flour)
- 1 ½ teaspoons salt
- ½ teaspoon instant yeast
- 1 ½ cups warm water
- 1 head roasted garlic (mashed)
- 1 ½ tablespoons chopped fresh rosemary (or 1 tablespoon dried)
- Olive oil for brushing
Instructions
In a large bowl, combine flour, salt, and yeast. Stir in the warm water, mashed roasted garlic, and chopped rosemary. Mix until you get a shaggy dough. Don’t worry—it’s supposed to look messy.
Cover the bowl and let it rest at room temperature for 12–18 hours. The dough should double in size and become bubbly on the surface.
Dust your hands and surface with flour. Gently shape the dough into a ball. Place it on parchment paper, cover, and let it rise for another 30–45 minutes.
Preheat your oven to 450°F (230°C) with the Dutch oven inside. Once hot, carefully transfer the dough (with parchment) into the pot. Cover and bake for 30 minutes, then uncover and bake for another 10–15 minutes until golden brown.
Why You’ll Love This Recipe
Easy, Beginner-Friendly Method
No stand mixer, no dough hook, and no muscle fatigue required. Just mix, rest, bake—and that’s it.
Healthy and Wholesome Ingredients
This bread is made with minimal, real-food ingredients—no preservatives, no additives. Whole wheat options can also boost fiber and nutrition.
Deep, Rustic Flavor with Minimal Effort
The slow rise gives the dough a natural tang, while roasted garlic and rosemary offer earthy, savory depth that keeps you coming back for more.
Ingredients You’ll Need
- 3 cups all-purpose flour (or mix with 1 cup whole wheat flour)
- 1 ½ teaspoons salt
- ½ teaspoon instant yeast
- 1 ½ cups warm water
- 1 head roasted garlic (mashed)
- 1 ½ tablespoons chopped fresh rosemary (or 1 tablespoon dried)
- Olive oil for brushing
Optional Ingredient Swaps
- Use thyme instead of rosemary for a different herbal note
- Add shredded Parmesan for a cheesy twist
- Use roasted shallots in place of garlic for a mild sweetness
Tools and Equipment
- Large mixing bowl
- Dutch oven or heavy oven-safe pot with lid
- Spatula or wooden spoon
- Parchment paper
- Clean kitchen towel or plastic wrap
Recipe Instructions (Step-by-Step)
Step 1: Mix the Dough
In a large bowl, combine flour, salt, and yeast. Stir in the warm water, mashed roasted garlic, and chopped rosemary. Mix until you get a shaggy dough. Don’t worry—it’s supposed to look messy.
Step 2: Let It Rest
Cover the bowl and let it rest at room temperature for 12–18 hours. The dough should double in size and become bubbly on the surface.
Step 3: Shape and Second Rise
Dust your hands and surface with flour. Gently shape the dough into a ball. Place it on parchment paper, cover, and let it rise for another 30–45 minutes.
Step 4: Bake to Golden Perfection
Preheat your oven to 450°F (230°C) with the Dutch oven inside. Once hot, carefully transfer the dough (with parchment) into the pot. Cover and bake for 30 minutes, then uncover and bake for another 10–15 minutes until golden brown.
Flavor Variations
Cheesy Rosemary Garlic Bread
Fold in ½ cup shredded mozzarella or sharp cheddar just before shaping for an indulgent upgrade.
Spicy Roasted Garlic and Chili Twist
Add ½ teaspoon chili flakes with the garlic for a warm, spicy kick.
Olive and Herb Rustic Loaf
Add ¼ cup chopped Kalamata olives and a teaspoon of Italian seasoning to the dough for Mediterranean flair.
Tips for Success
Fresh vs Dried Rosemary
Fresh rosemary gives a fragrant punch. If using dried, reduce the amount slightly as it’s more concentrated.
How to Roast Garlic Properly
Slice the top off a garlic bulb, drizzle with olive oil, wrap in foil, and roast at 400°F for 35–40 minutes until soft and golden.
Getting the Crust Just Right
Bake with the lid on to trap steam—this creates that signature artisan crust. Uncovering it at the end helps brown and crisp.
Common Mistakes to Avoid
Not Letting Dough Ferment Long Enough
Don’t rush the rise. The long rest develops flavor and structure.
Using the Wrong Pot
Avoid thin metal pans. Use a heavy-duty Dutch oven that retains heat and moisture.
Overloading with Garlic or Herbs
Balance is key. Too much garlic or rosemary can overpower the loaf.
Storage and Reheating Tips
Freezing Options
Slice the loaf and freeze in a zip-top bag. Reheat slices in a toaster or warm oven.
Best Way to Reheat Without Losing Texture
Wrap in foil and warm in a 350°F oven for 10–15 minutes. Avoid microwaving to preserve the crust.
Health Benefits and Nutritional Info
Whole Wheat Options
Using part or all whole wheat flour increases fiber, B vitamins, and antioxidants.
Garlic and Rosemary Benefits
Garlic supports heart health and immunity, while rosemary offers anti-inflammatory properties and mental clarity.
Estimated per slice (1 of 12):
- Calories: 150
- Carbs: 27g
- Protein: 4g
- Fat: 3g
- Fiber: 2g
onclusion
There you have it—an easy, comforting, and incredibly flavorful Rustic No Knead Rosemary Garlic Bread recipe that anyone can master. Whether you’re a seasoned home baker or just starting out, this loaf will fill your kitchen with warmth and your heart with pride. Try it once, and you’ll never want store-bought bread again.
So what are you waiting for? Give it a go, and don’t forget to share your delicious creation with friends and family.
FAQs
1. Can I make this gluten-free?
Yes! Use a high-quality gluten-free all-purpose flour mix, and check that it includes xanthan gum for texture.
2. Can I add cheese to this recipe?
Absolutely—Parmesan, mozzarella, or Asiago make great additions. Add ½ cup during the shaping step.
3. Do I really need a Dutch oven?
It’s ideal for crusty bread, but you can use any oven-safe pot with a tight-fitting lid.
4. Can I prepare the dough the night before?
Yes. That’s the best way! Mix in the evening and bake the next morning or afternoon.
5. How do I know when the bread is fully baked?
It should sound hollow when tapped, and the crust should be golden brown. Internal temp should be around 200°F.