
Hard-boiled eggs are a kitchen staple, prized for their portability, protein content, and versatility. Yet even the most seasoned home cook can be perplexed when peeling back a perfectly cooked egg only to find a conspicuous greenish-gray ring encircling the yolk. Although this discoloration is perfectly harmless, it can be off-putting and make your otherwise flawless eggs look overdone. In this article, we’ll explore the chemistry behind the green ring, provide step-by-step instructions for avoiding it, and share bonus tips to take your hard-boiled eggs from ordinary to extraordinary—all while maintaining clear hierarchy with H1, H2, and H3 headings.
The Science Behind the Green Ring
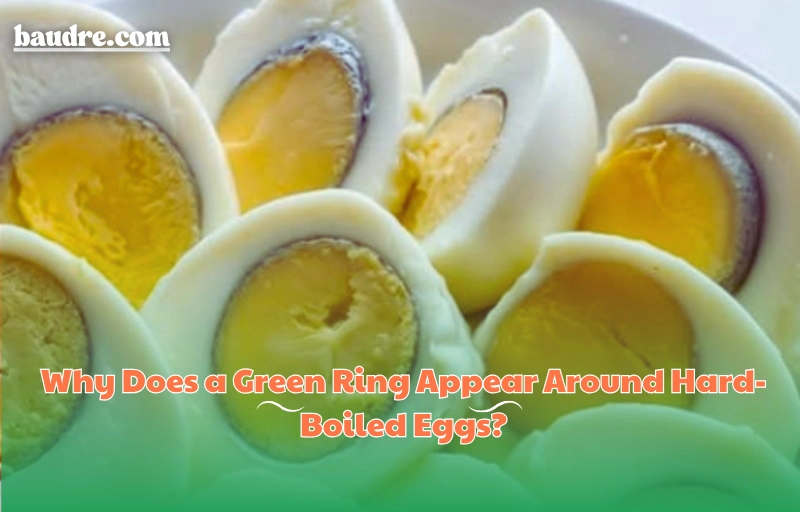
What Causes the Greenish Hue?
Eggs contain two key elements relevant to this phenomenon: sulfur compounds in the egg white and iron in the yolk. When an egg is exposed to heat, proteins in the white begin to denature and release hydrogen sulfide (H₂S) gas. That gas migrates toward the center of the egg—where the yolk resides—and reacts with iron to form iron sulfide (FeS). Iron sulfide is grayish-green in color, and when it forms as a thin layer on the surface of the yolk, the once-bright yellow center suddenly displays an unappetizing ring.
Why Overcooking Accelerates Discoloration
— Increased Sulfur Release: Higher temperatures and longer cooking times break down more protein in the egg white, producing more hydrogen sulfide.
— Extended Reaction Window: Even after you turn off the heat, residual warmth allows the iron-sulfur reaction to continue unless the eggs are cooled rapidly.
— Elevated pH Effects: As eggs cook, pH in the white can rise, which can facilitate the migration of hydrogen sulfide toward the yolk.
The good news is that this process is entirely predictable and avoidable with proper timing and temperature control.
Mastering the Art of Hard-Boiling
Preparing Your Eggs for Success
Before heating your water, take these preparatory steps for a smoother cooking experience:
— Select Eggs That Are 5–7 Days Old: Contrary to intuition, very fresh eggs are harder to peel because the white’s inner membrane clings tightly to the shell. A few days’ aging raises the pH slightly, loosening that bond.
— Bring Eggs to Room Temperature (Optional): Let cold eggs sit on the counter for 15–20 minutes to reduce the temperature gap when they hit the hot water. This can help prevent cracking.
— Inspect and Sort: Discard any eggs with visible hairline cracks. Those will leak egg white into the water, leading to uneven cooking and egg white “threads” clinging to the shell.
Precision Timing—Your Best Defense
Timing is the linchpin of hard-boiling. Too short, and yolks remain underdone; too long, and the green ring emerges.
- Arrange in a Single Layer: Place eggs gently in the bottom of a saucepan, ensuring they don’t touch or stack.
- Cover with Cold Water: Pour in enough cold tap water to submerge eggs by about 1–2 inches (2.5–5 cm). Starting cold ensures gradual, even heating.
- Bring to a Gentle Boil: Over medium heat, allow the water to reach a rolling boil. Rapid, aggressive boils can jostle eggs, causing cracks.
- Shut Off Heat and Cover: Once vigorous bubbles appear, immediately turn off the burner and place a tight-fitting lid on the pot.
- Set Your Timer:
- 9 minutes for slightly jammy yolks—ideal for salads with a soft, creamy center
- 12 minutes for fully set yolks—perfect for deviled eggs, egg salad, or slicing without runniness
Resist the urge to lift the lid before the timer dings; consistency is key.
The Critical Cooling Phase
Rapid Chilling to Stop the Reaction
Your eggs have absorbed enough heat during their timed bath. Now it’s time to halt the chemical action:
- Prepare an Ice Bath: While the eggs are cooking, fill a large bowl with ice cubes and cold water.
- Transfer Immediately: As soon as your timer goes off, use a slotted spoon to move eggs into the ice bath.
- Let Rest for 5–10 Minutes: Chilling accomplishes two objectives: it stops residual cooking (preventing the green ring) and helps the egg white contract away from the shell, easing peeling.
After chilling, crack and peel under a gentle stream of running water. The moving water helps wash away tiny shell fragments and membrane pieces.
Pro Tips for Professional-Quality Eggs
Salt and Vinegar—Your Unexpected Allies
— Pinch of Salt: Adding a teaspoon of salt to the boiling water can help coagulate any egg white that escapes a cracked shell, preventing unsightly “ribbons” in your cooking water.
— Splash of Vinegar: One tablespoon of white vinegar in the water can similarly help by denaturing stray proteins, making cleanup simpler and reducing the likelihood of whites leaking out.
Neither addition affects flavor but can improve cooking performance and presentation.
Testing Doneness Without Guesswork
If you’re refining your craft and unsure about exact timing:
— Spin Test: Place an egg on a flat surface and spin it. A fully cooked egg spins smoothly and rapidly; an undercooked egg wobbles due to its semi-liquid center shifting.
— Partial Crack Method: After about 10 minutes, crack one egg gently and peel a small section to inspect yolk color. If it’s to your liking (and free of a green ring), proceed with the rest.
Beyond the Basics: Flavor and Storage
Creative Uses for Perfect Hard-Boiled Eggs
Hard-boiled eggs are more than a simple snack—they’re a versatile ingredient:
— Elevated Egg Salad: Dice yolks and whites, fold with mayonnaise, Dijon mustard, minced shallots, chopped herbs (such as tarragon or chives), and a pinch of smoked paprika for dimension.
— Gourmet Deviled Eggs: Blend yolks with Greek yogurt, a touch of Sriracha for heat, and truffle oil or horseradish for an upscale twist; garnish with microgreens.
— Salad Nicoise Reinvented: Halve eggs atop a medley of tender green beans, roasted fingerling potatoes, kalamata olives, seared tuna or salmon, all drizzled with a lemon-Dijon vinaigrette.
— Curried Egg Sandwich: Mash eggs with a spoonful of curry powder, chopped celery, golden raisins, and crunchy almonds for an exotic flavor profile.
Storing for Maximum Freshness
Proper storage safeguards texture, taste, and food safety:
— Unpeeled Eggs: Store in their carton in the coldest part of the refrigerator (not on the door) for up to one week. The shell’s natural barrier keeps contaminants at bay.
— Peeled Eggs: Submerge peeled eggs in cold water in a covered container, changing the water daily; consume within two to three days. Alternatively, wrap each peeled egg in damp paper towel inside an airtight box to prevent drying out.
— Avoid Room Temperature: Once cooked, eggs should not remain out longer than two hours, as bacteria grow rapidly between 4 °C (40 °F) and 60 °C (140 °F).
Frequently Asked Questions
Is the Green Ring Dangerous?
Absolutely not. Iron sulfide is inert and poses no health risk when eaten. The green ring is purely cosmetic, signaling only that the egg was held at high heat for too long.
Can I Prevent Cracking Without Cold Starts?
While some recipes call for adding eggs to already boiling water, this method raises the chance of shell fractures. If you prefer that technique, gently lower eggs with a slotted spoon and deduct about one minute from your final resting time—then cool them immediately.
Why Are Fresh Eggs Harder to Peel?
Very fresh eggs have a lower pH (more acidic white), which adheres strongly to the inner membrane. As eggs age, carbon dioxide escapes through the shell, raising the pH and causing the membrane to separate slightly—making peeling a breeze.
A Simple Routine to Perfect Boiled Eggs
By integrating these three pillars into your practice—controlled heat, meticulous timing, and rapid chilling—you’ll cultivate a foolproof routine:
- Controlled Heat: Always start with cold water; bring to a gentle boil rather than a rolling frenzy.
- Meticulous Timing: Nine to twelve minutes off heat under a covered pot is your sweet spot.
- Rapid Chilling: Ice bath isn’t optional—it’s essential to lock in color and ease peeling.
Embrace this ritual, and you’ll elevate a humble egg into a culinary cornerstone that dazzles on its own or enriches countless dishes.
Conclusion
Mastering the hard-boiled egg is as much science experiment as cooking endeavor. By understanding the iron-sulfur chemistry, respecting precise timing, and employing an ice bath, you eliminate the dreaded green ring and unlock perfect texture. Whether you’re crafting elegant canapés, powering through a balanced breakfast, or building layered salads, these foolproof techniques will deliver consistently beautiful results. Next time you boil eggs, remember: gentle heat, accurate timing, and prompt chilling are all you need to transform an everyday staple into a polished, gourmet treat.