
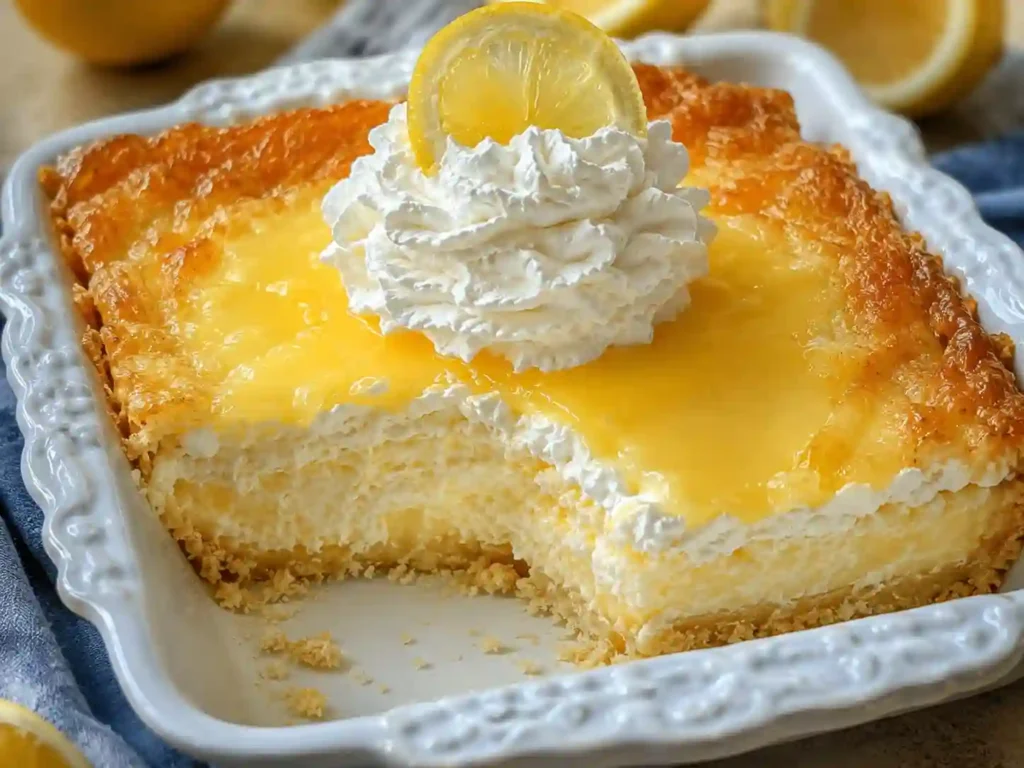
There are desserts that come and go, and then there are the timeless classics that never leave the table once they’re introduced. The No-Bake Woolworth Icebox Cheesecake is one of those legendary recipes that has been passed down through generations. Light, creamy, slightly tangy, and sitting on a buttery graham cracker crust, this dessert is a nostalgic favorite that brings back memories of old-fashioned lunch counters and family gatherings.
What makes this cheesecake so special is its simplicity. There is no oven required, no complicated baking techniques, and no risk of cracks or water baths. Instead, it relies on a fluffy whipped filling that sets beautifully in the refrigerator, creating a refreshing dessert that feels both light and indulgent at the same time.
This version stays true to the vintage Woolworth-style cheesecake while improving clarity, texture, and structure for modern home cooks. Whether you’re preparing it for holidays, potlucks, summer gatherings, or simply a weekend treat, this dessert always delivers comfort in every bite.
Why This No-Bake Cheesecake Works So Well
The magic of this recipe lies in the combination of whipped evaporated milk and cream cheese. When whipped properly, evaporated milk transforms into a light, airy texture that acts like a natural stabilizer. This replaces the need for baking or gelatin while still giving the cheesecake structure.
The cream cheese adds richness and tang, balancing the sweetness from sugar and the freshness of lemon juice. The graham cracker crust provides a crunchy contrast, preventing the dessert from feeling too soft or heavy.
Because it is chilled instead of baked, the texture remains smooth, almost mousse-like, making it perfect for warm weather or when you want a dessert that feels refreshing rather than dense.
Ingredients
For the Graham Cracker Crust:
- 2 cups (200g) graham cracker crumbs
- ½ cup (115g) unsalted butter, melted
- 3 tablespoons granulated sugar
- 1 pinch salt
For the Creamy Cheesecake Filling:
- 8 oz (225g) cream cheese, softened
- 1 can (12 oz / 354 ml) evaporated milk, chilled
- ¾ cup (150g) granulated sugar
- ¼ cup (60ml) fresh lemon juice
- 1 teaspoon vanilla extract
- 1 packet (about 2¼ tsp) unflavored gelatin (optional for extra firmness, but not required)
Optional Topping:
- 1 cup whipped cream or whipped topping
- Fresh strawberries, cherries, or fruit preserves
Step-by-Step Instructions
1. Prepare the Crust
Start by mixing graham cracker crumbs, melted butter, sugar, and a pinch of salt in a bowl. Stir until the texture resembles wet sand. Every crumb should be lightly coated in butter so it holds together when pressed.
Press the mixture firmly into a 9×13-inch dish or a deep pie pan. Use the back of a spoon or a flat cup to compact it evenly. Once done, place it in the refrigerator for at least 20 minutes to firm up while you prepare the filling.
2. Prepare the Cream Cheese Base
In a large mixing bowl, beat the softened cream cheese until smooth and creamy. This step is important because any lumps will affect the final texture.
Add sugar gradually and continue mixing until fully combined. Then add vanilla extract and lemon juice. The lemon juice not only adds flavor but also helps the filling set slightly and gives it that classic cheesecake tang.
3. Whip the Evaporated Milk
In a separate chilled bowl, pour the evaporated milk and whip it using a hand mixer or stand mixer. Beat for several minutes until it becomes light, fluffy, and doubled in volume. This step is what gives the cheesecake its signature airy texture.
If you are using gelatin for extra firmness, dissolve it according to package instructions and gently fold it into the whipped milk before combining it with the cream cheese mixture.
4. Combine the Mixtures
Gently fold the whipped evaporated milk into the cream cheese mixture. Do this slowly to avoid deflating the airy texture. The goal is to keep the filling light while ensuring everything is fully incorporated.
Once smooth and fluffy, pour the mixture over the chilled crust. Spread it evenly using a spatula.
5. Chill Until Set
Cover the dish with plastic wrap and refrigerate for at least 6 hours, preferably overnight. This resting time allows the cheesecake to fully set and develop its flavor.
The longer it chills, the better the texture becomes.
Serving Suggestions
Once fully set, slice the cheesecake into clean squares or wedges. Serve chilled for the best texture and flavor.
This dessert pairs beautifully with:
- Fresh strawberries or blueberries
- A drizzle of fruit syrup
- A dollop of whipped cream
- A light dusting of crushed graham crackers
It also works perfectly for summer gatherings, where a cold and creamy dessert is always appreciated.
Tips for Best Results
To get the perfect Woolworth-style cheesecake, always use cold evaporated milk straight from the refrigerator before whipping. Warm milk will not hold air properly.
Make sure the cream cheese is fully softened before mixing to avoid lumps. If it’s too cold, the filling will not become smooth.
Do not rush the chilling process. This dessert needs time to set properly, and cutting it too early may result in a soft texture that doesn’t hold shape.
For a firmer version, gelatin can be added, but traditional recipes rely only on whipping and chilling.
Variations You Can Try
You can easily customize this cheesecake to match different flavors:
- Strawberry version: Add strawberry puree or top with strawberry glaze
- Lemon version: Increase lemon juice for a brighter citrus flavor
- Chocolate version: Add cocoa powder or chocolate drizzle
- Berry swirl: Swirl mixed berry jam into the filling before chilling

No-Bake Woolworth Icebox Cheesecake (Classic Creamy Retro Dessert)
Ingredients
For the Graham Cracker Crust:
- 2 cups (200g) graham cracker crumbs
- ½ cup (115g) unsalted butter, melted
- 3 tablespoons granulated sugar
- 1 pinch salt
For the Creamy Cheesecake Filling:
- 8 oz (225g) cream cheese, softened
- 1 can (12 oz / 354 ml) evaporated milk, chilled
- ¾ cup (150g) granulated sugar
- ¼ cup (60ml) fresh lemon juice
- 1 teaspoon vanilla extract
- 1 packet (about 2¼ tsp) unflavored gelatin (optional for extra firmness, but not required)
Optional Topping:
- 1 cup whipped cream or whipped topping
- Fresh strawberries, cherries, or fruit preserves
Instructions
Start by mixing graham cracker crumbs, melted butter, sugar, and a pinch of salt in a bowl. Stir until the texture resembles wet sand. Every crumb should be lightly coated in butter so it holds together when pressed.
Press the mixture firmly into a 9×13-inch dish or a deep pie pan. Use the back of a spoon or a flat cup to compact it evenly. Once done, place it in the refrigerator for at least 20 minutes to firm up while you prepare the filling.
In a large mixing bowl, beat the softened cream cheese until smooth and creamy. This step is important because any lumps will affect the final texture.
Add sugar gradually and continue mixing until fully combined. Then add vanilla extract and lemon juice. The lemon juice not only adds flavor but also helps the filling set slightly and gives it that classic cheesecake tang.
In a separate chilled bowl, pour the evaporated milk and whip it using a hand mixer or stand mixer. Beat for several minutes until it becomes light, fluffy, and doubled in volume. This step is what gives the cheesecake its signature airy texture.
If you are using gelatin for extra firmness, dissolve it according to package instructions and gently fold it into the whipped milk before combining it with the cream cheese mixture.
Gently fold the whipped evaporated milk into the cream cheese mixture. Do this slowly to avoid deflating the airy texture. The goal is to keep the filling light while ensuring everything is fully incorporated.
Once smooth and fluffy, pour the mixture over the chilled crust. Spread it evenly using a spatula.
Cover the dish with plastic wrap and refrigerate for at least 6 hours, preferably overnight. This resting time allows the cheesecake to fully set and develop its flavor.
The longer it chills, the better the texture becomes.
Each variation keeps the same creamy base but adds a unique twist.
Storage Instructions
Store leftovers in the refrigerator, covered, for up to 4–5 days. The texture remains stable and creamy even after chilling for multiple days.
This cheesecake is not ideal for freezing, as it can slightly change the airy texture once thawed.
Final Thoughts
The No-Bake Woolworth Icebox Cheesecake is proof that simple ingredients can create unforgettable desserts. With its creamy filling, buttery crust, and melt-in-your-mouth texture, it remains a beloved classic that never goes out of style.
It’s easy to prepare, beginner-friendly, and perfect for any occasion where you want a dessert that feels nostalgic yet timeless. Once you try it, it quickly becomes one of those recipes you return to again and again.